Failure to Define Standardized Inspection Criteria
 Suppliers in the aerospace industry rely heavily on their operators to interpret the internal processes for part creation, but often times these operators are provided a set of work instructions without a control plan.
Without a control plan, the operator does not have the complete picture for managing and inspecting the discrete characteristics of the part. These results in an inconsistency of planning and can create problems in the part production. As a result, scrap is created, which is costly and downright wasteful.
(This is Part 5 of a 5 Part series of posts on solving your toughest quality inspection challenges. Click here and get the entire 5-Part series packaged into a single white paper.)
In order to overcome this problem, the operator at the work center must be provided with both work instructions with the associated control plan.. The control plan can provide the visibility to the discreet elements of creating and managing the characteristics, by operations and provide the inspection method and frequency of testing thus providing a comprehensive data package.
By using a single software tool, inspection criteria is defined, and the control plan and work instructions are combined into a shop document, that is easy to read and accessibly. Such an approach provides savings, while providing a consistent control plan document thus improving productivity and reducing errors and time to market.
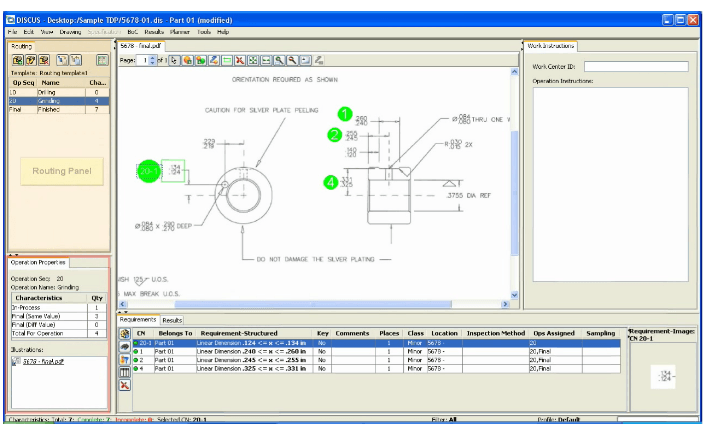
![]() Software that provides process control plans coupled with a set of work instructions and analysis streamlines processes and shows high-risk process failures before they occur. In this way, the quality engineer can take pro-active steps to guaranteeing part integrity. The work instructions and control plan guide the processes and are communicated in one document from one tool so everyone who touches the part is aware of the risks and can manage them appropriately.
Software that provides process control plans coupled with a set of work instructions and analysis streamlines processes and shows high-risk process failures before they occur. In this way, the quality engineer can take pro-active steps to guaranteeing part integrity. The work instructions and control plan guide the processes and are communicated in one document from one tool so everyone who touches the part is aware of the risks and can manage them appropriately.
One company in El Cajon, California, overcame their significant part delivery delay caused due to inspection mis-communication. By employing a comprehensive planning tool, the supervisor was able to allow his operators to manage the processes and work instructions without his micro management. The software tool provided the salient information needed for the operator to inspect the part without intervention. This was a key feature of the planning software that provided the work instructions with the control plan at the respective work center.
Previously, the lone supervisor for the shop had to inspect the products manufactured at all the work centers and was running himself into inspection frenzy. Production often was halted until he had a chance to intervene for on the spot inspections and this resulted in tremendous delays and late-to-market issues. With the planning software tool, the operator is in charge of the inspection as he has the complete data to perform the inspections and does not have to rely on tribal knowledge of the supervisor. By empowering the operators, throughput was greatly increased, less scrap was created and the operator had ownership of the processes he manages.
Now a list of tools, gauges and inspection methods and frequency is provided to each work station in addition to the dimensional information affected by the tooling. The planning software tool has become the method of communicating and instructing the operators and scrap and rework were dramatically reduced. Overall, this software tool had the following impact:
- Engages operators to their full potential
- Provides immediate availability of Control Plan as well as Special Instructions which prevents delays.
- Improved employee performance, instead of operators foraging for work instructions and control plans.
- Frees up the supervisor for other managerial tasks and reduces idle time of the operators.
In the first week of the software deployment, this supplier was able to highlight a characteristic change from the final inspection to its operation. The length of the component was reduced from .3109 inches in the in process drawing to .3028 inches in the final inspection. The software via a characteristic analysis showed them this delta value between the final and s the in-process operation. Plus the step-by-step procedures with illustrations and gauging at every operation gave them information that had otherwise been hidden from the operator and was the responsibility of the lone supervisor managing many work centers.
Sign Up for a DISCUS Software Webinar and learn how to end your quality nightmares.

